Video and Image Search
This document corresponds to the video and image search folder contained within a VIAME desktop installation. Search finds objects in an archive of unannotated imagery or video from an example of what is being looked for, and can turn the results into a detection model for a new category of object. Both are used to bootstrap annotation for training more accurate models.
Search can be run three ways, covered in this order below: from the Query page of DIVE, which is the recommended route; from the command line; and from the older standalone SEARCH interface, which is deprecated. To find objects from a description in words instead, with no index or example image needed, see text query and VLM.
How Search Works
Searching takes two steps. The archive is first indexed: a pipeline describes regions of each image or video with a descriptor, and the descriptors are stored in an index. The regions described can be whole frames, object detections, or object tracks. At query time a descriptor is computed for the query image or video, and the entries of the index closest to it are returned.
The results can then be refined by marking which are correct and which are not, a procedure called iterative query refinement (IQR). Each round of feedback trains a model for the query and re-ranks the results with it. Saving that model out is rapid model generation: the model can be for a new object category, or an attribute of an existing one, and can be run in detection pipelines or used to start later searches.
Searching in DIVE
The Query page of DIVE Desktop searches many datasets at once, from an image, a frame of a video, an existing annotation or a text description. It needs no scripts or project folder. The DIVE query page documents it in full.
Building an Index
Open the Query tab, or select datasets in the Library and click Index. Add the datasets to be searched, choose how they are described, and press Build index:
- Around generic detections - runs the generic object detector and describes its boxes
- Detection and tracking - detects and tracks, then describes the tracks
- Around existing annotations - describes the annotations a dataset already has
- Whole frames - describes each frame as a whole, with no detector
Builds run as jobs on the Jobs page. Every indexed dataset shares one index, which datasets can be added to or removed from later.
Running a Query
A query starts from one of:
- Image - choose an image file, and drag a box around one object or leave the whole image as the example
- Video - choose a dataset or video file and a frame, and optionally drag a box on it
- Annotation - in the annotation viewer, the Image Query panel searches from the selected annotation or track
- Text - type what to find, which is searched for with the SAM3 add-on
Results come back as a grid of cropped images, ranked by similarity. Mark results correct or incorrect and press Refine to re-rank them, repeating until the results are as wanted.
Saving a Model and Annotations
Save model keeps the refined model as a trained pipeline, which is then run on other datasets like any other detector. A saved model can also start a new search. Accepted results are written to their datasets as annotations with Save on the results toolbar, without leaving the page.
On the Web
The web version has a Query tab for image and video frame queries with refinement. Saving models, text queries and saving results as annotations are in the desktop version only.
Searching from the Command Line
The same index and queries are available from a terminal through viame index and the scripts in this folder, which suits large archives, machines without a display and scripted workflows.
Initial Setup
Building and running this example requires either a VIAME install or a build from source, along with the python packages numpy, pymongo, torch, torchvision, matplotlib, and python-tk.
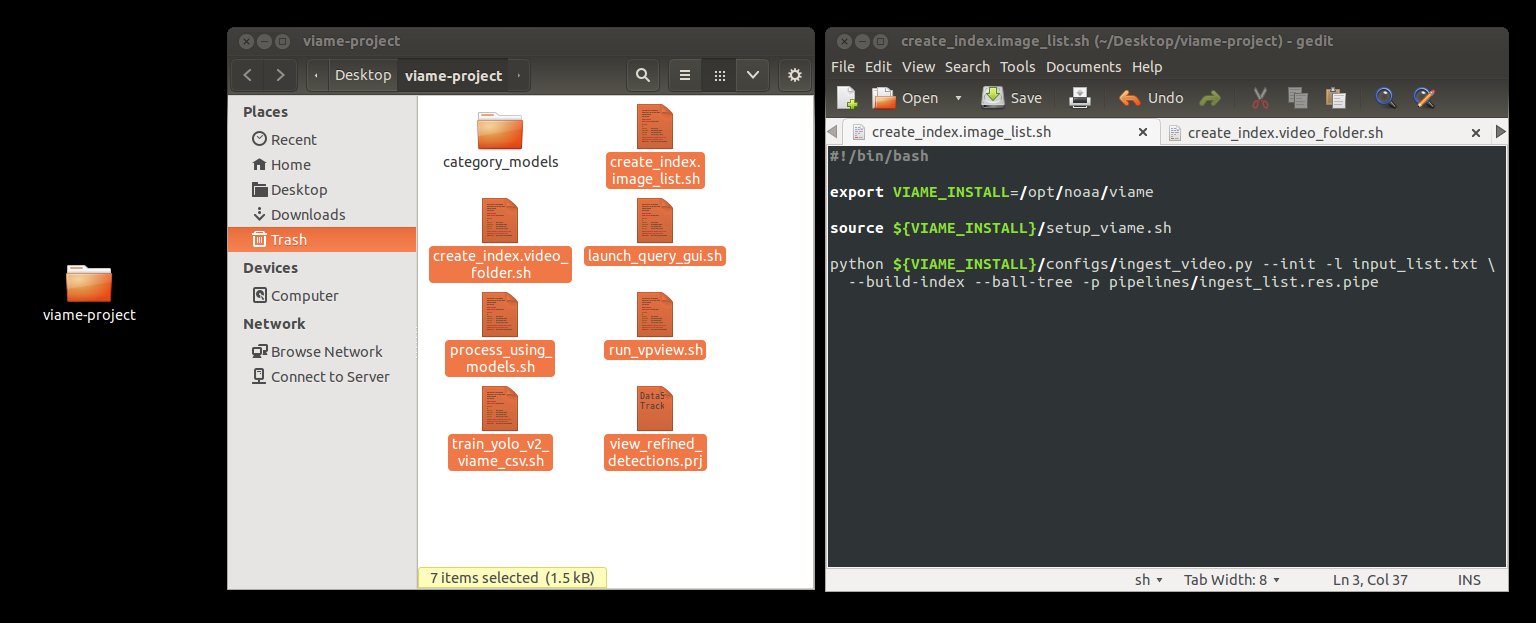
First, you should decide where you want to run this example from. Doing it in the example folder tree is fine as a first pass, but if it is something you plan on running a few times or on multiple datasets, you probably want to select a different place in your user space to store generated databases and model files. This can be accomplished by making a new folder in your directory and either copying the scripts (.sh, .bat) from this example into this new directory, or via copying the project files located in [VIAME-INSTALL]/configs/prj-linux (or prj-windows) to this new directory. After copying these scripts to the directory you want to run them from, you may need to make sure the first line in the top, “VIAME_INSTALL”, points to the location of your VIAME installation (as shown below) if your installation is in a non-default directory, or you copied the example files elsewhere. If using windows, all ‘.sh’ scripts in the below will be ‘.bat’ scripts that you should be able to just double-click to run.
Ingest Image or Video Data
First, create_index.[type].sh should be called to initialize a new database, and populate it with descriptors generated around generic objects to be queried upon. Here, [type] can either be ‘around_detections’, ‘detection_and_tracking’, or ‘full_frame_only’, depending on if you want to run matching on spatio-temporal object tracks, object detections, or full frames respectively (see VIAME quick start guide). If you want to run it on a custom selection of images, make a file list of images called ‘ingest_list.txt’ containing your images, one per line. For example, if you have a folder containing png images, run ‘ls [folder]/*.png > ingest_list.txt’ on the command line to make this list. Alternatively, if ingesting videos, make a directory called ‘videos’ which contains all of your .mpg, .avi, .etc videos. If you look in the ingest scripts, you can see links to these sources if you wish to change them. Next run the ingest script, as below.
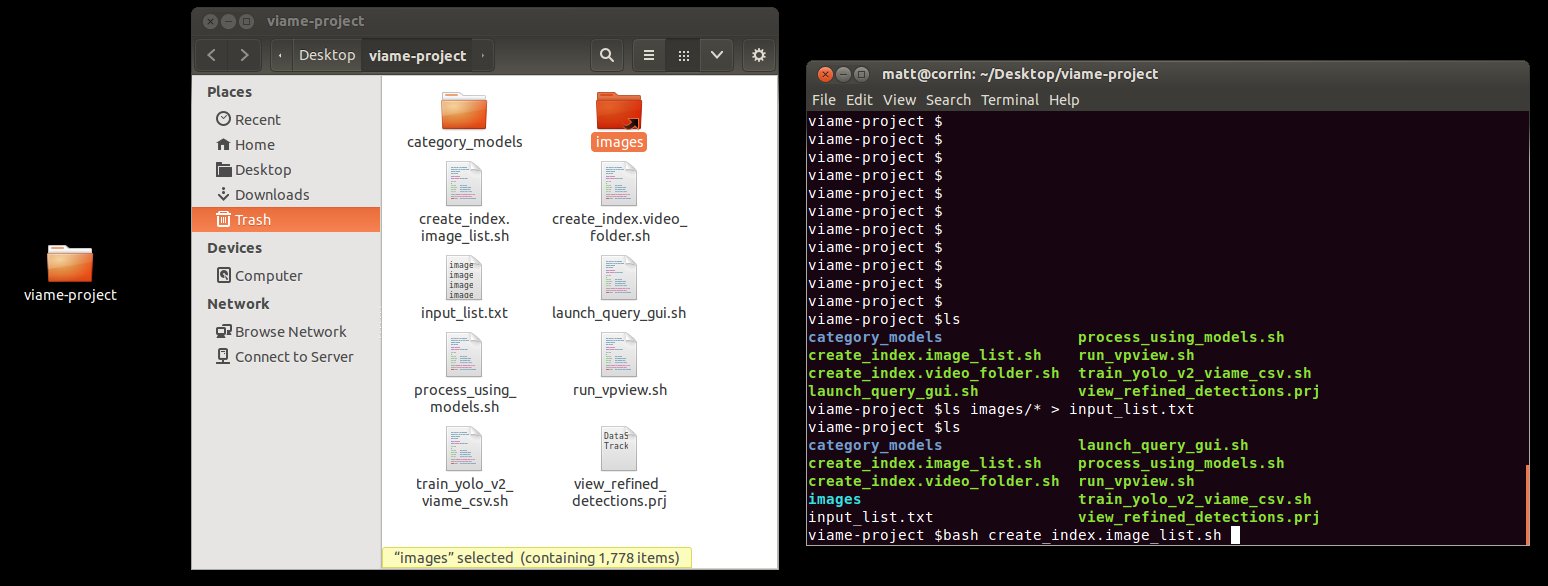
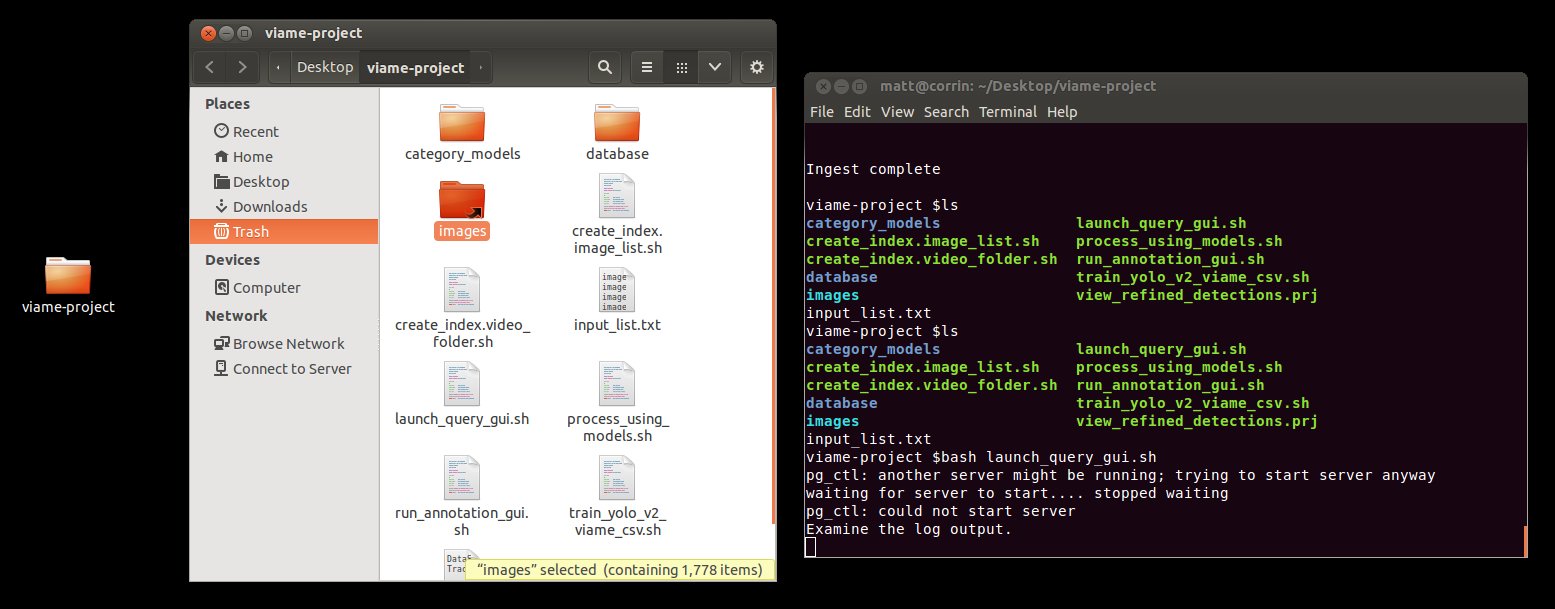
This should take a little bit if the process is successful, see below. If you already have a database present in your folder it will ask you if you want to remove it.
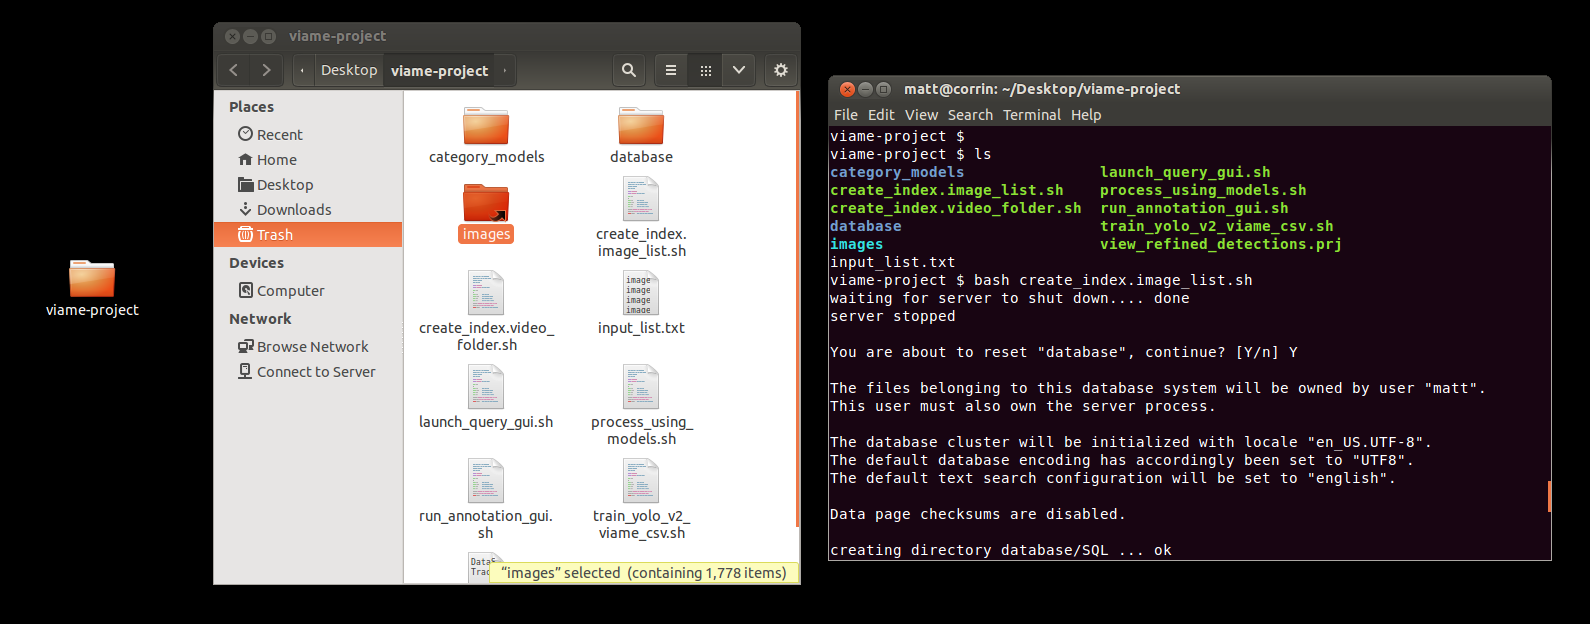
If your ingest was successful, you should get a message saying ‘ingest complete” with no errors in your output log. If you get an error, and are unable to decipher it, send a copy of your database/Logs folder and console output to ‘viame.developers@gmail.com’.
Managing the Index
‘viame index’ is the tool behind the create_index scripts and the way to maintain an index afterwards: ‘viame index add -l list.txt’ (or ‘-d videos’, ‘-v video.mp4’) ingests more media into an existing index, ‘viame index list’ and ‘viame index status [stream]’ show what is indexed, ‘viame index remove [stream]’ drops a video, and ‘viame index build’ refreshes the hash codes (with ‘–retrain’ to retrain the ITQ model over everything). ‘viame index hash’ is the low-level tool that trains a model and hash codes from an arbitrary descriptor file or table.
Index Storage
By default the index is a set of plain files in the ‘database’ folder, one group per ingested video or image list sharing its basename: ‘[name].index’ (a JSON manifest that marks the entry as indexed), ‘[name]_descriptors.csv’ (descriptor ids, track references and per-frame history), ‘[name]_tracks.csv’ (the object tracks), ‘[name]_descriptors.npy’ (the descriptor vectors as a float32 matrix), ‘[name]_uids.txt’ (the id of each row) and ‘[name]_hashes.npy’ (locality-sensitive hash codes of each row). The ITQ hashing model shared by every entry lives in ‘database/ITQ’. Adding a video re-runs the ingest for it and refreshes only its own files; removing one is deleting its files. No server process is involved, and the folder can be copied or backed up as-is.
The earlier embedded PostgreSQL store is still available: pass ‘–backend postgres’ to ‘viame index add’ (the database is initialised on the first add) and ‘–index-backend postgres’ to ‘viame search’. Both backends use the same ITQ files, but a folder holds one or the other, not a mix; commands on an existing index detect its backend.
Perform a Query
perform_cli_query searches the index from the command line. It takes a track file holding a box around each object to search for (query_box.csv) and a list of the images those boxes are on (query_list.txt), and writes the matches to query_results.csv as tracks, with the similarity of each as its confidence:
bash perform_cli_query.sh query_box.csv query_list.txt query_results.csv
Re-Run Models on Additional Data
If you have one or more .svm model files in your trained_model folder, they can be run with the scripts in this folder: generate_detections_using_svm_model runs the generic detector over ingest_list.txt and scores its detections, process_full_frames_using_svm_model scores whole frames, and process_database_using_svm_model scores what is already in the index. This can either be on the same data you just processed, or new data. Each produces a detection file called ‘svm_detections.csv’ containing a probability for each input model in the trained_model directory per detection. Alternatively, this can be run from within the annotation GUI.
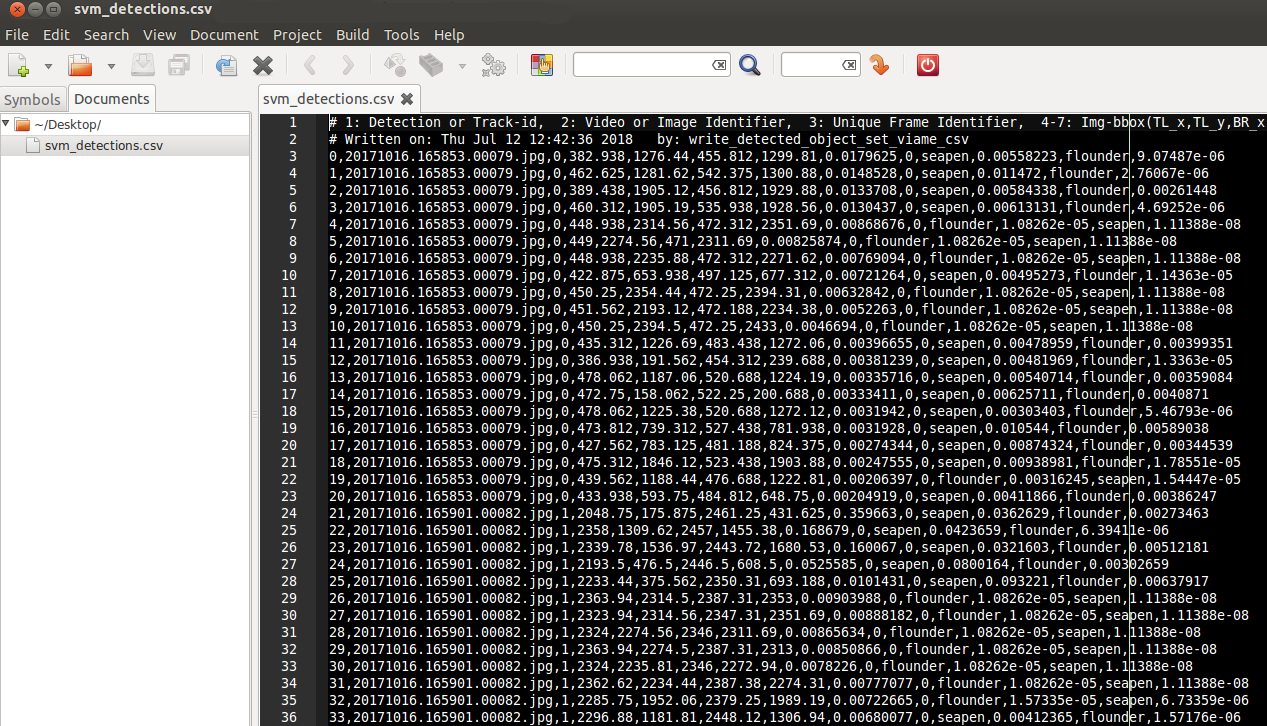
The resultant detection .csv file is in the same common format that most other examples in VIAME take. You can load this detection file up in the annotation GUI and select a detection threshold for your newly-trained detector, see here. You can use these models on any imagery, it doesn’t need to be the same imagery you trained it on.
Correct Results and Train a Better Model
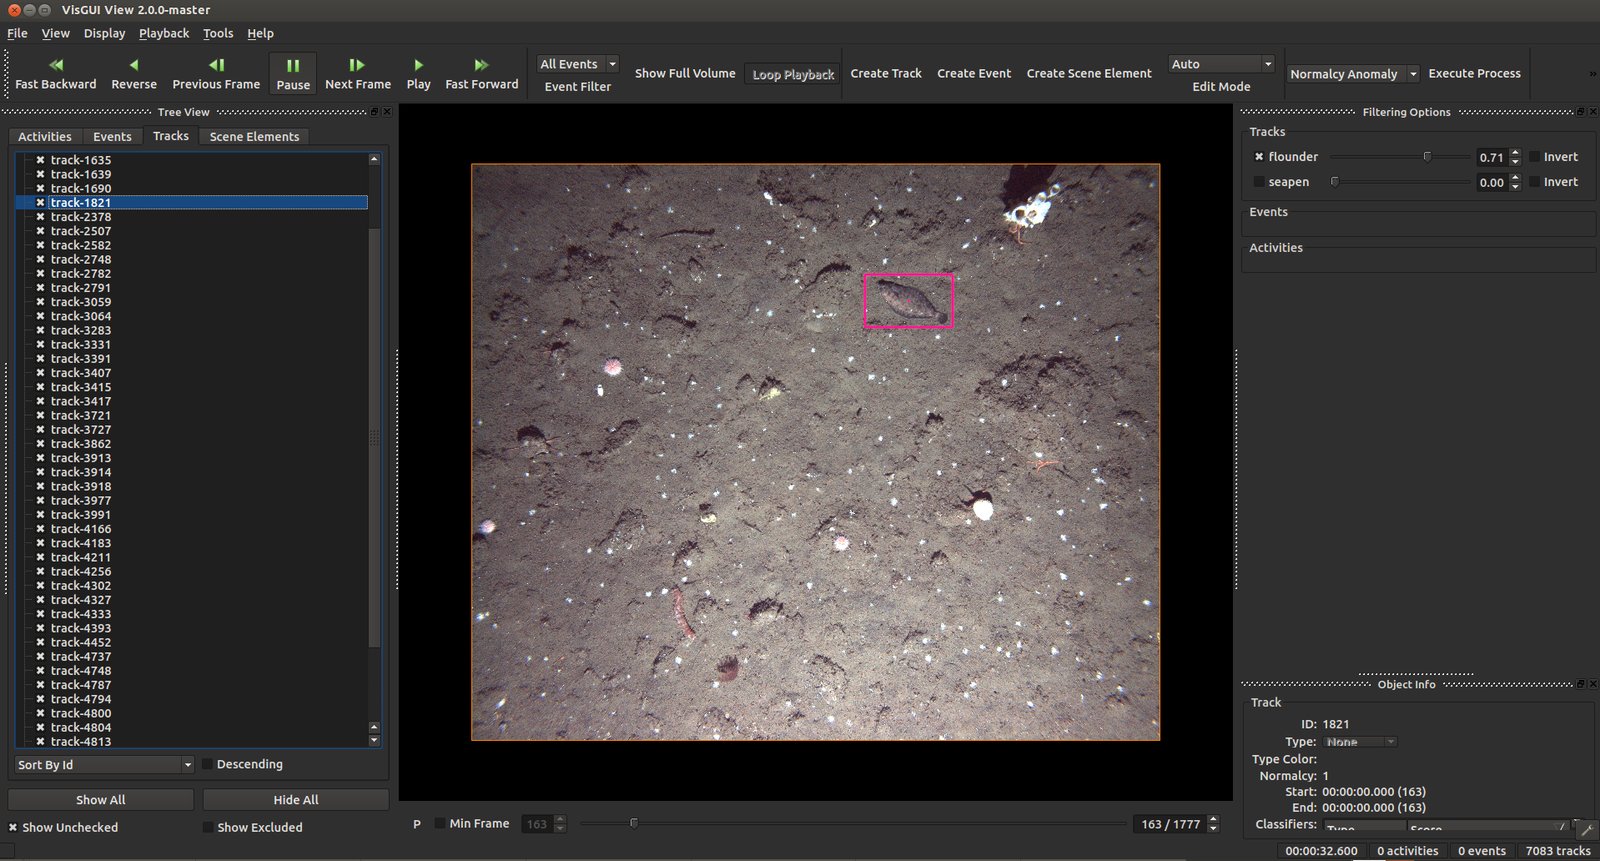
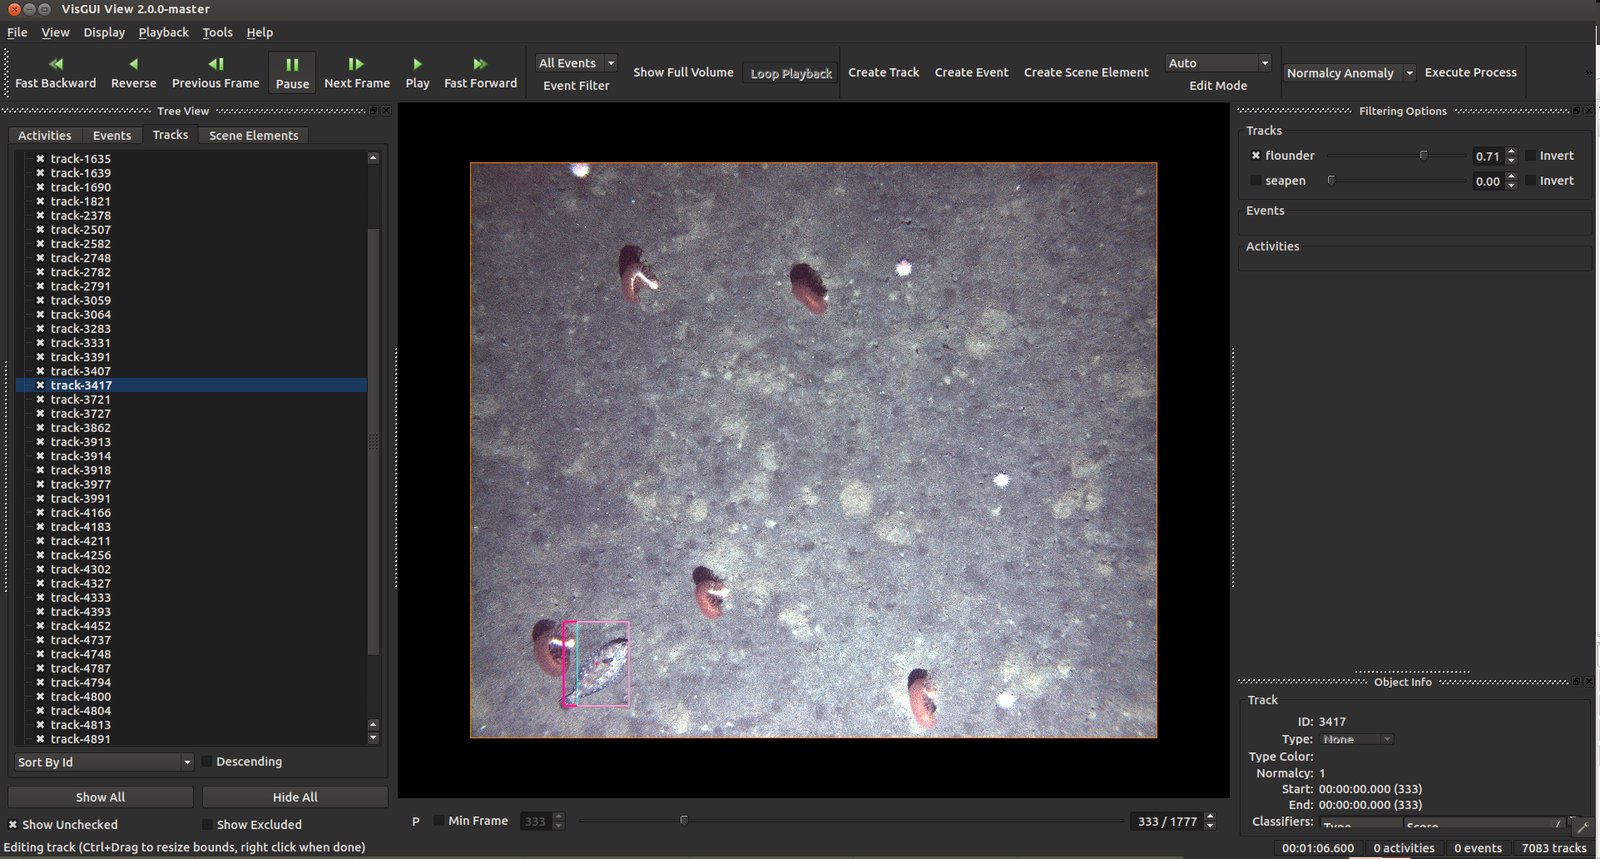
If you have a detection .csv file for corresponding imagery, and want to train a better (deep) model for the data, you can first correct any mistakes (either mis-classifications, grossly incorrect boxes, or missed detections) in the annotation GUI. To do this, set a detection threshold you want to annotate at, do not change it, and make the boxes as perfect as possible at this threshold. Over-ride any incorrectly computed classification types, and create new detections for objects which were missed by the initial model. Export a new detection csv (File->Export Tracks) after correcting as many boxes as you can. Lastly, feed this into the ground-up detector training example. Make sure to set whatever threshold you set for annotation in the [train].sh script you use for new model training.
SEARCH Interface (Deprecated)
The standalone SEARCH interface predates the Query page of DIVE. It is deprecated: it remains available but is no longer developed, and DIVE or the command line tools above are recommended for new work. It searches an index built from the command line, as in Ingest Image or Video Data.
Perform an Image Query
After performing an ingest ‘bash launch_search_interface.sh’ should be called to launch the GUI.
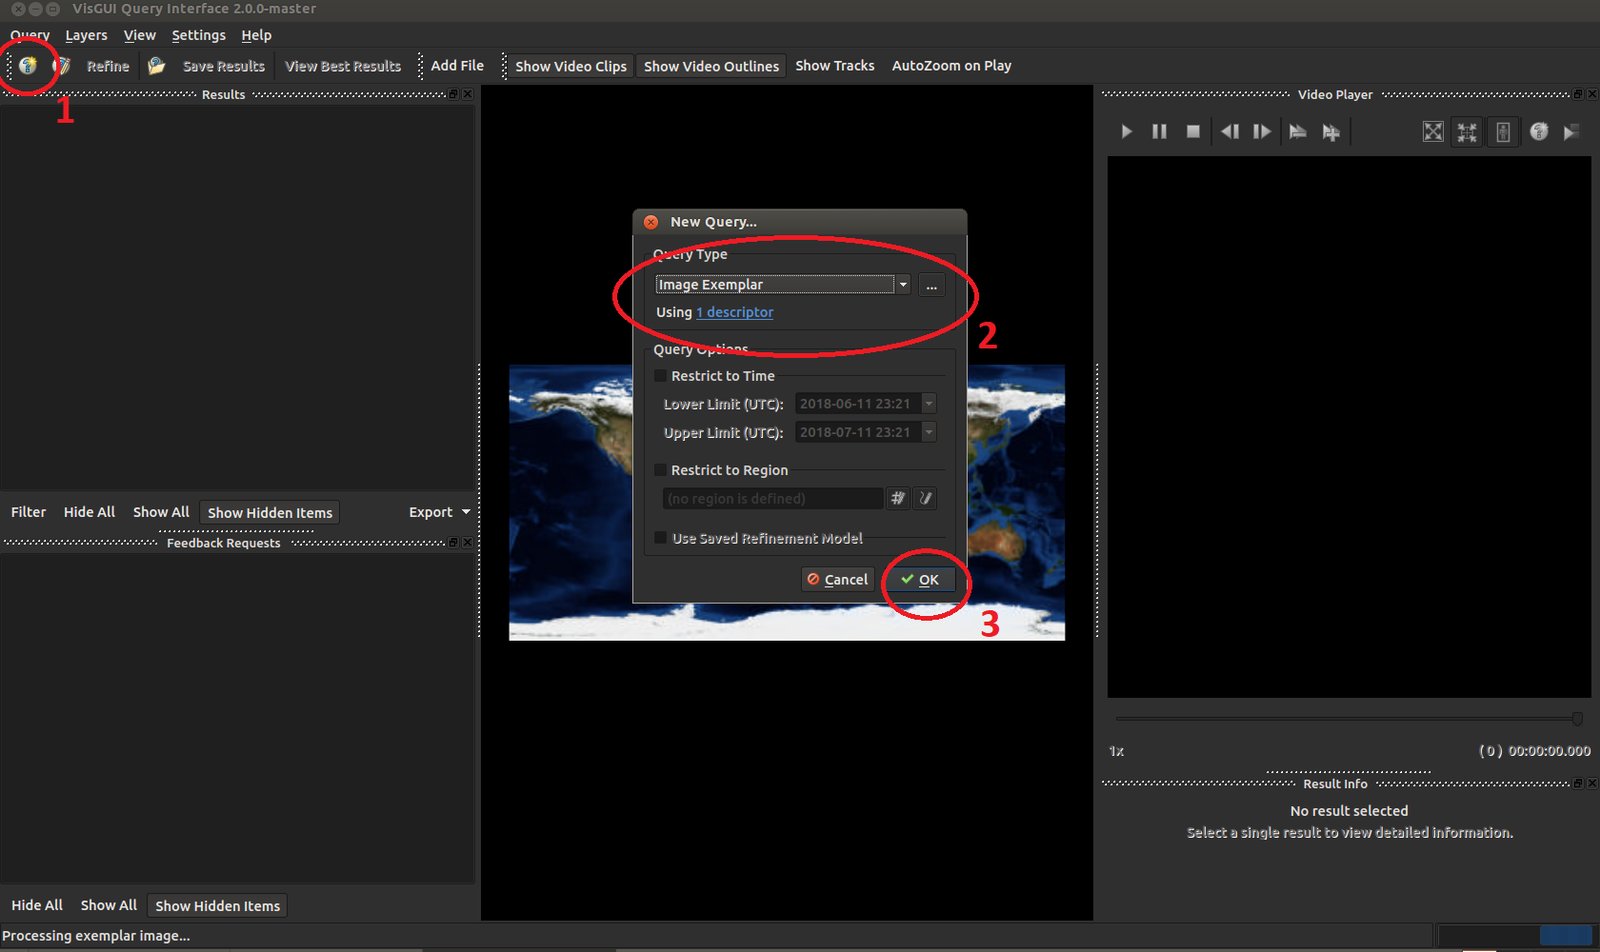
In this example, we will first start with an image query.
- Select, in the top left, Query -> New
- From the Query Type drop down, select Image Exemplar
Next select an image to use as an exemplar of what you are looking for. This image can take one of two forms, either a large image containing many objects including your object of interest, or a cropped out version of your object.
Whatever image you give, the system will generate a full-frame descriptor for your entire image alongside sub-detections on regions smaller than the full image.
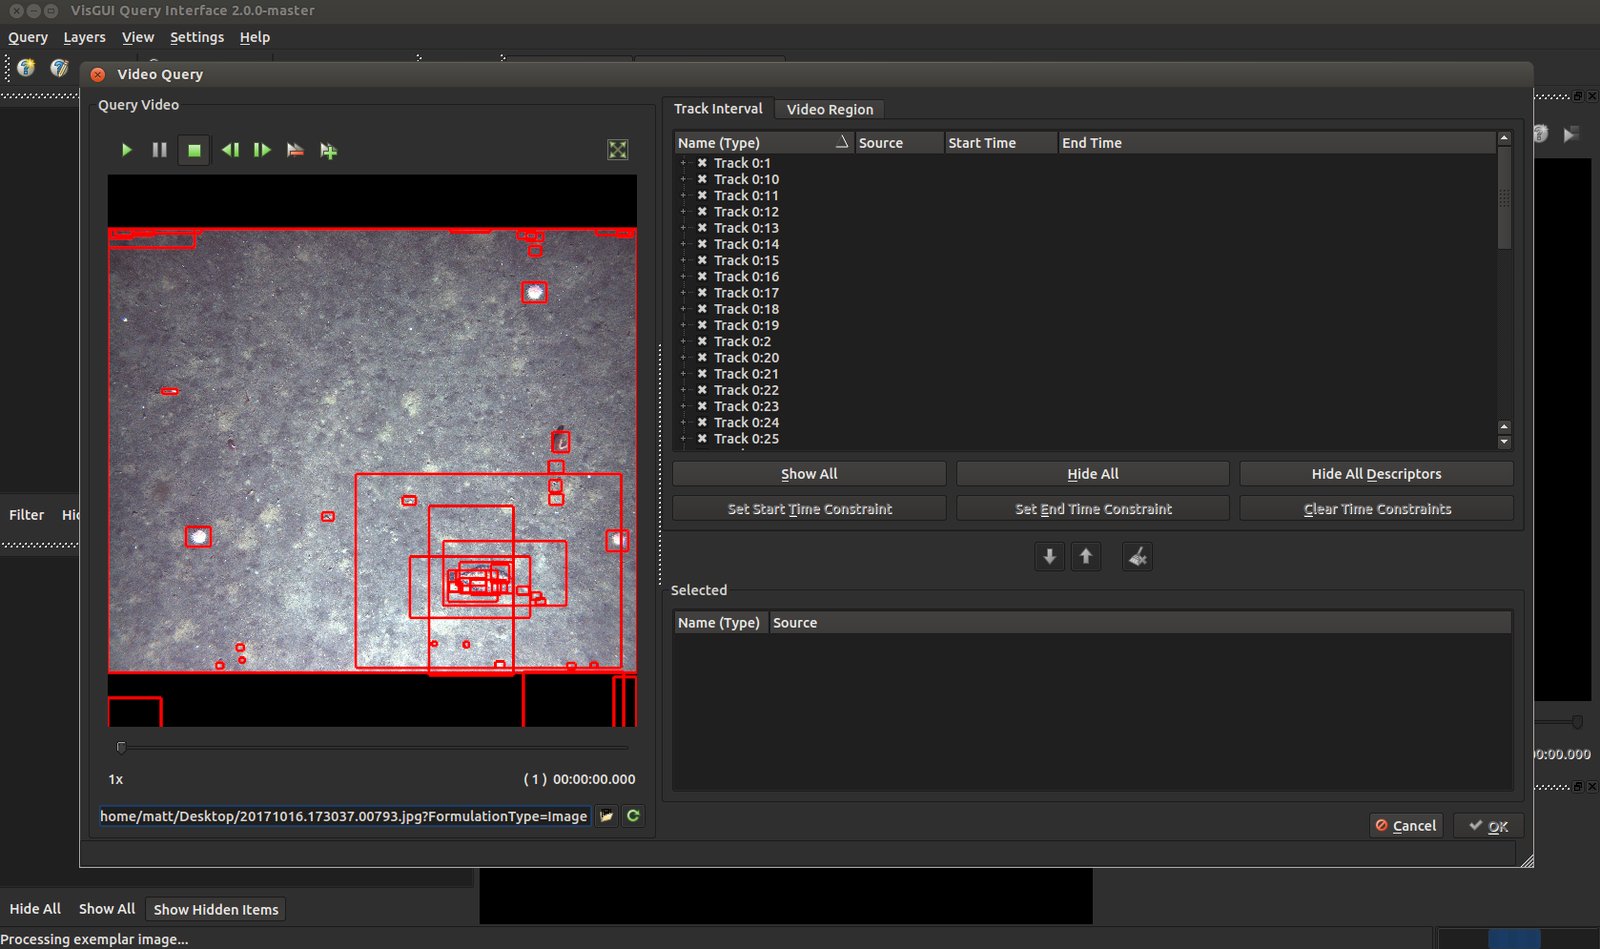
Select the box you are most interested in.
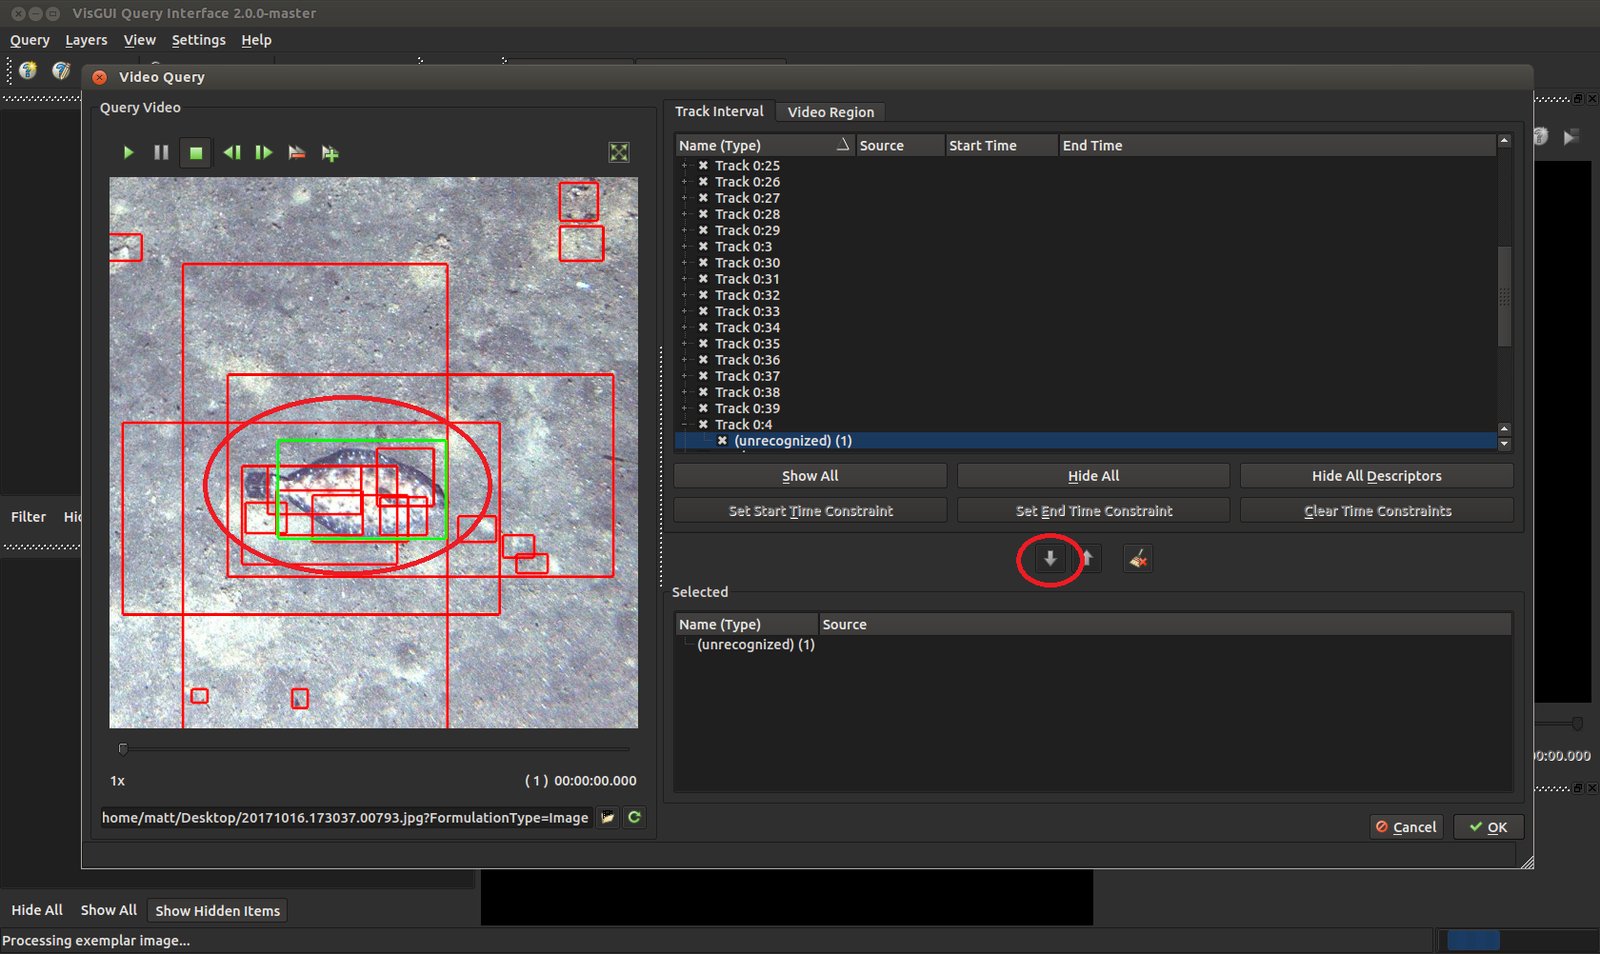
Press the down arrow to highlight it (the selected box should light up in green). Press okay on the bottom right, then okay again on the image query panel to perform the query.
Optionally, the below four instructions are an aside on how to generate an image chip just showing your object of interest. They can be ignored if you don’t need them. If the default object proposal techniques are not generating boxes around your object for a full frame, you can use this method then select the full frame descriptor around the object. In the below we used the free GIMP painter tool to crop out a chip. Install this using ‘sudo apt-get install gimp’, on Ubuntu, https://www.gimp.org/ on Windows).
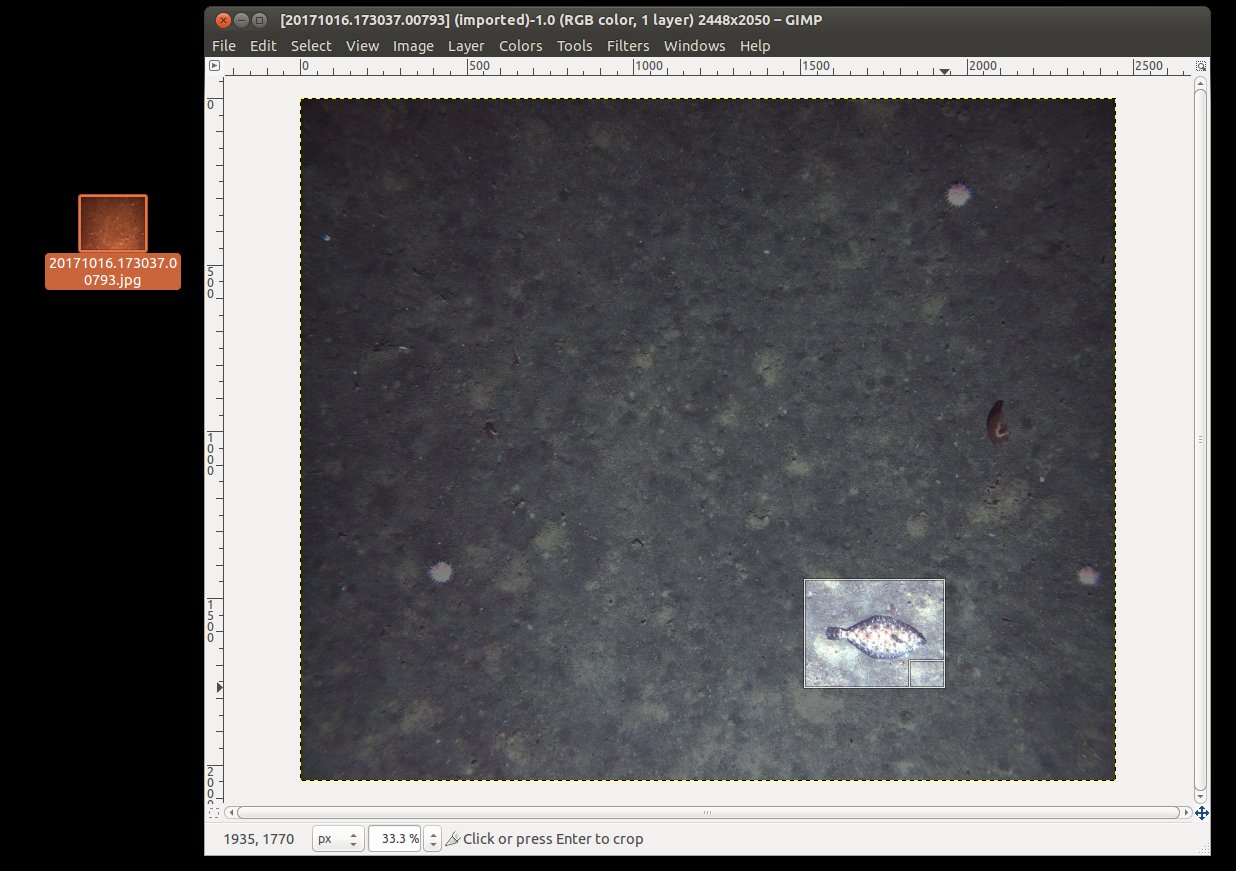
Right click on your image in your file browser, select ‘Edit with Gimp’, press Ctrl-C to open the above dialogue, highlight the region of interest, press enter to crop.
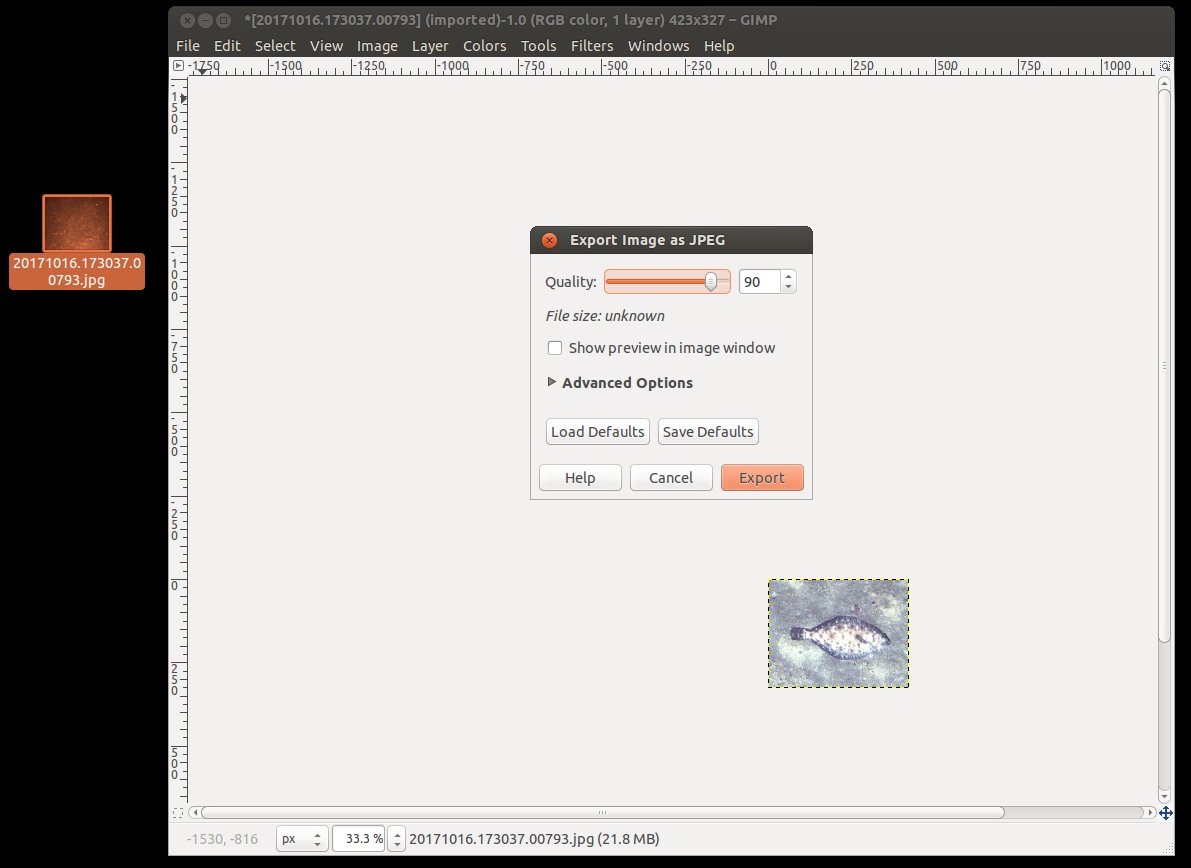
Save out your crop to wherever you want, preferably somewhere near your project folder.
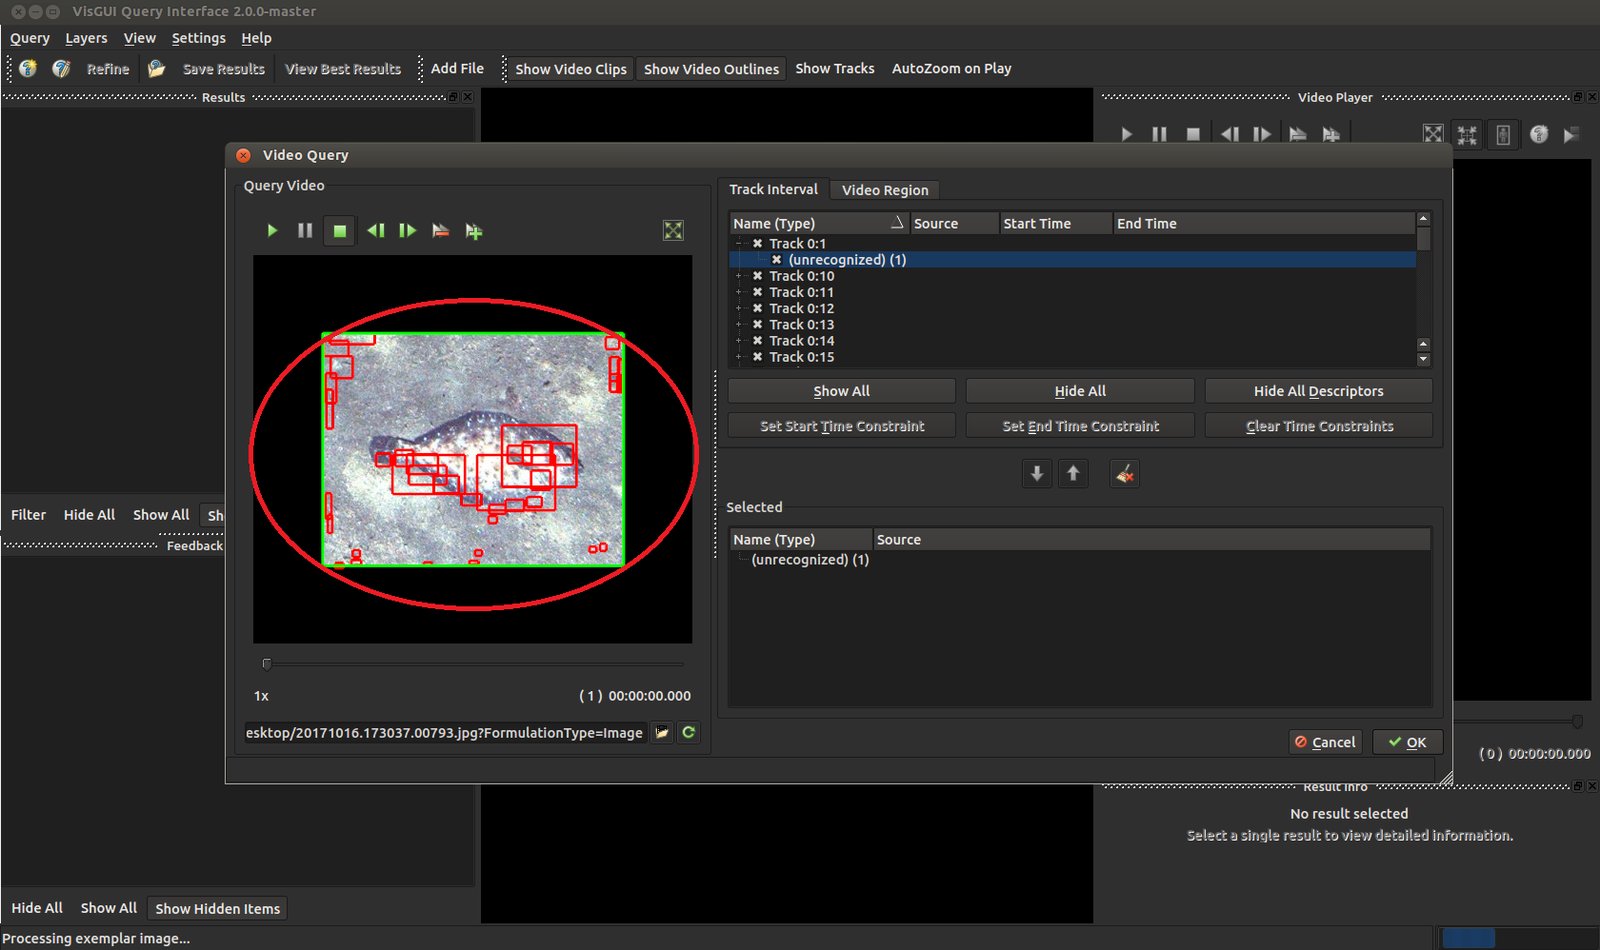
Now you can put this chip through the image query system, instead of the full frame one.
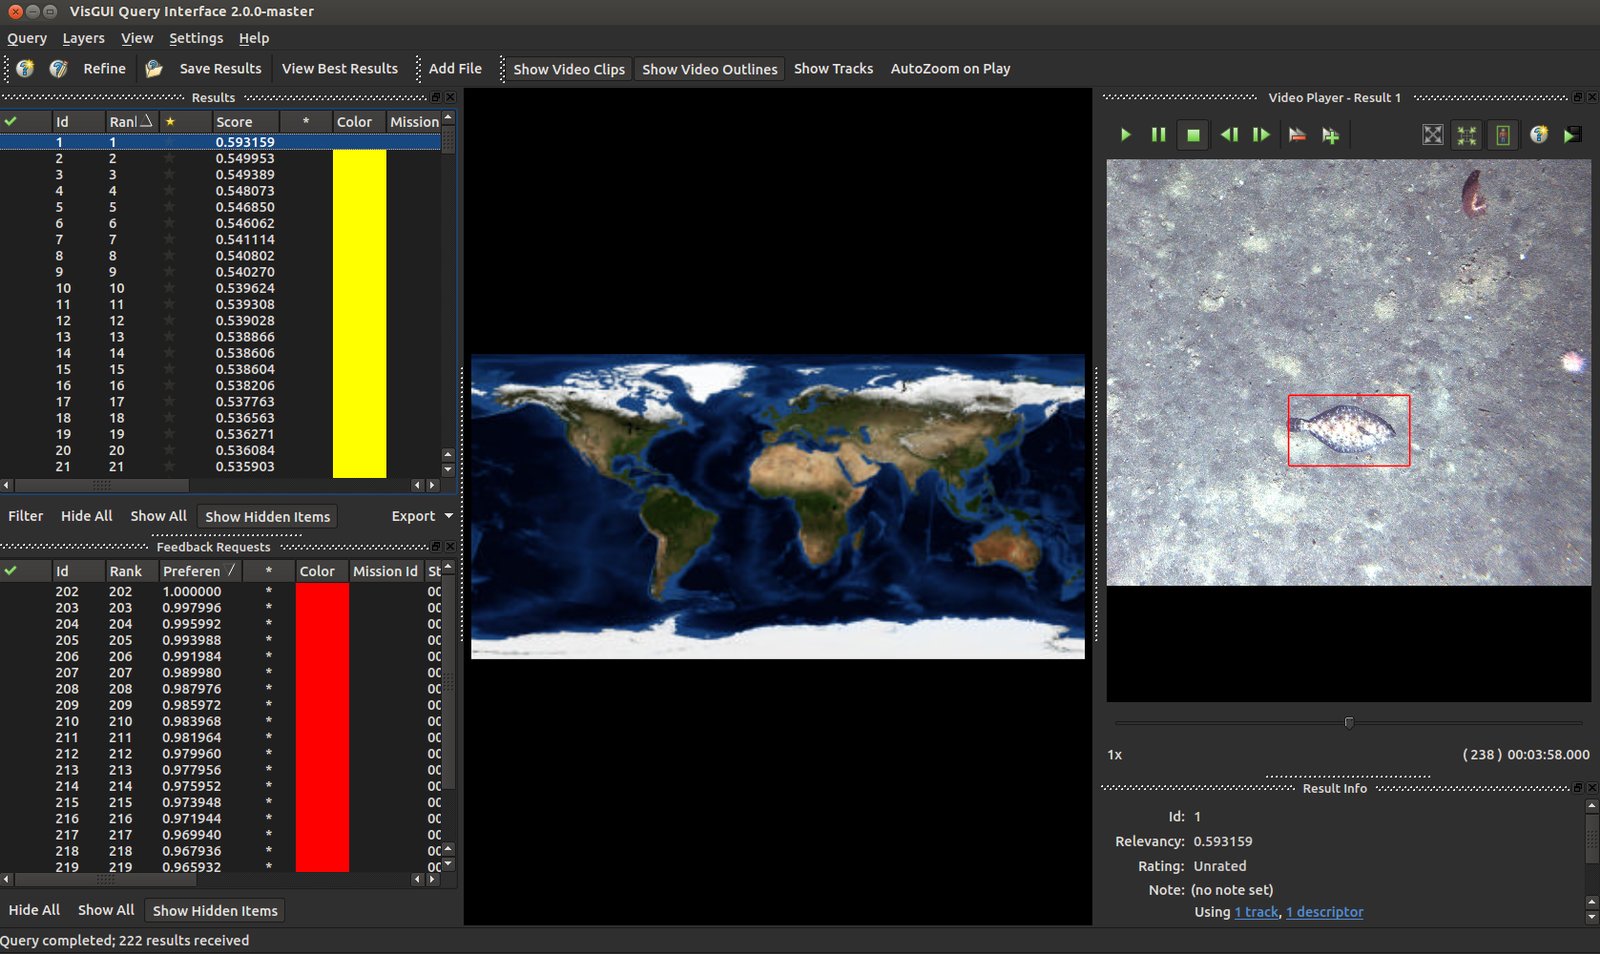
Regardless which method you use, when you get new results they should look like this. You can select them on the left and see the entries on the right. Your GUI may not look like this depending on which windows you have turned on, but different display windows can be enabled or disabled in Settings->Tool Views and dragged around the screen.
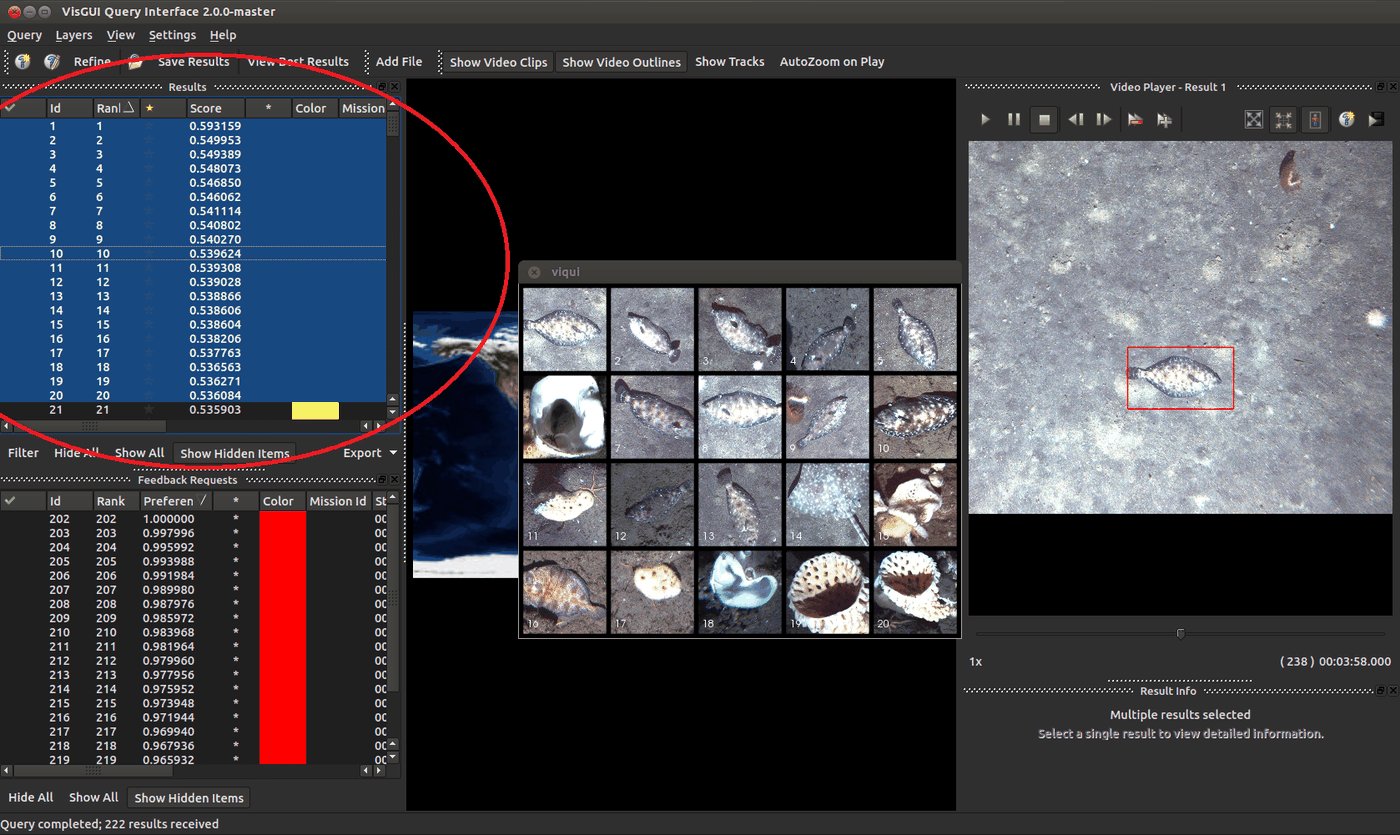
Results can be exported by highlighting entries and selecting Query -> Export Results in the default VIAME csv format and others. You can show multiple entries at the same time by highlighting them all (hold shift, press the first entry then the last), right-clicking on them, and going to ‘Show Selected Entries’.
Refine Results and Save a Model
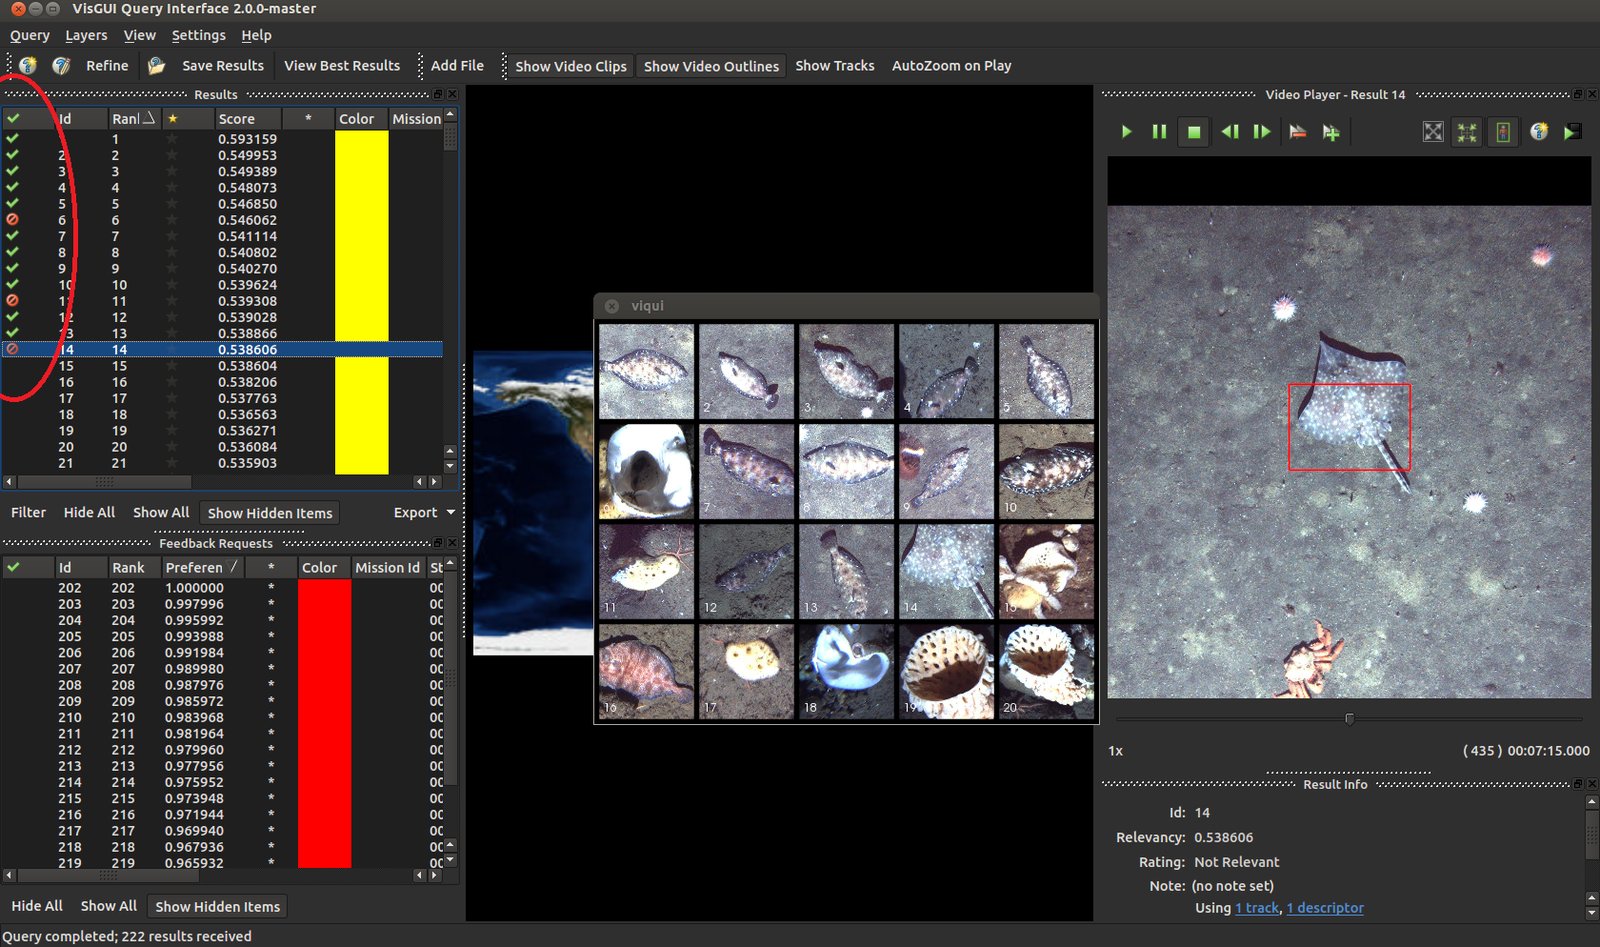
When you perform an initial query, you can annotate results as to their correct-ness in order to generate a model for said query concept. This can be accomplished via a few key-presses. Either right click on an individual result and select the appropriate option, or highlight an entry and press ‘+’ or ‘-’ on your keyboard for faster annotation.
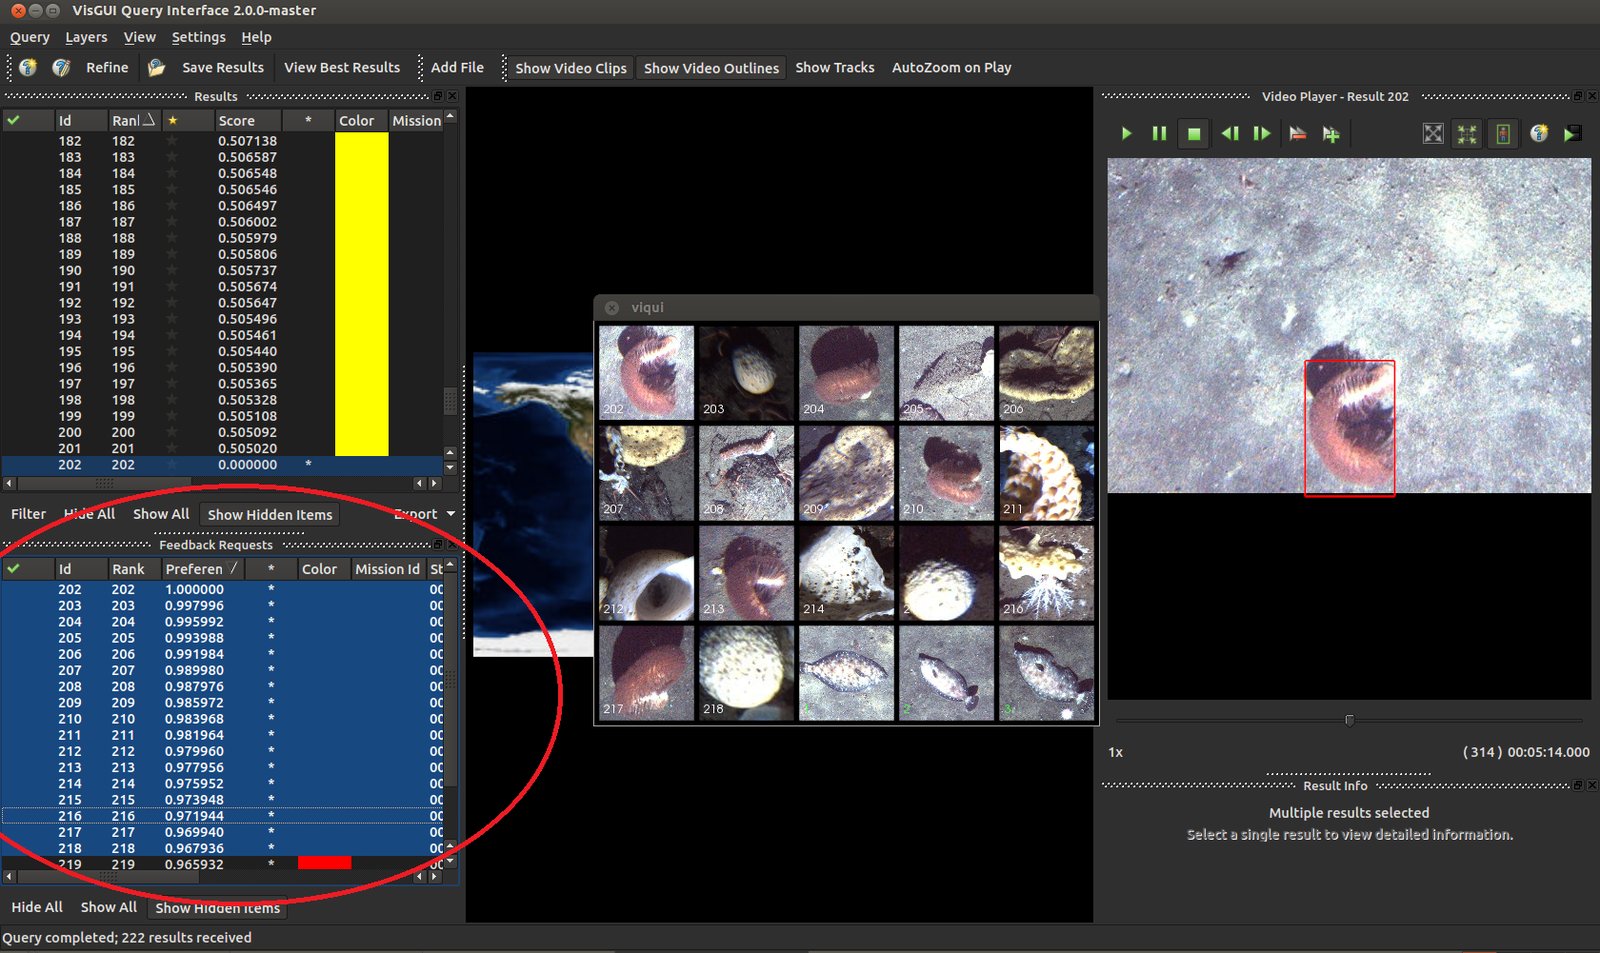
You might want to annotate entries from both the top results list, and the requested feedback list (bottom left in the above). This can improve the performance of your model significantly. After annotating your entries press ‘Refine’ on the top left.
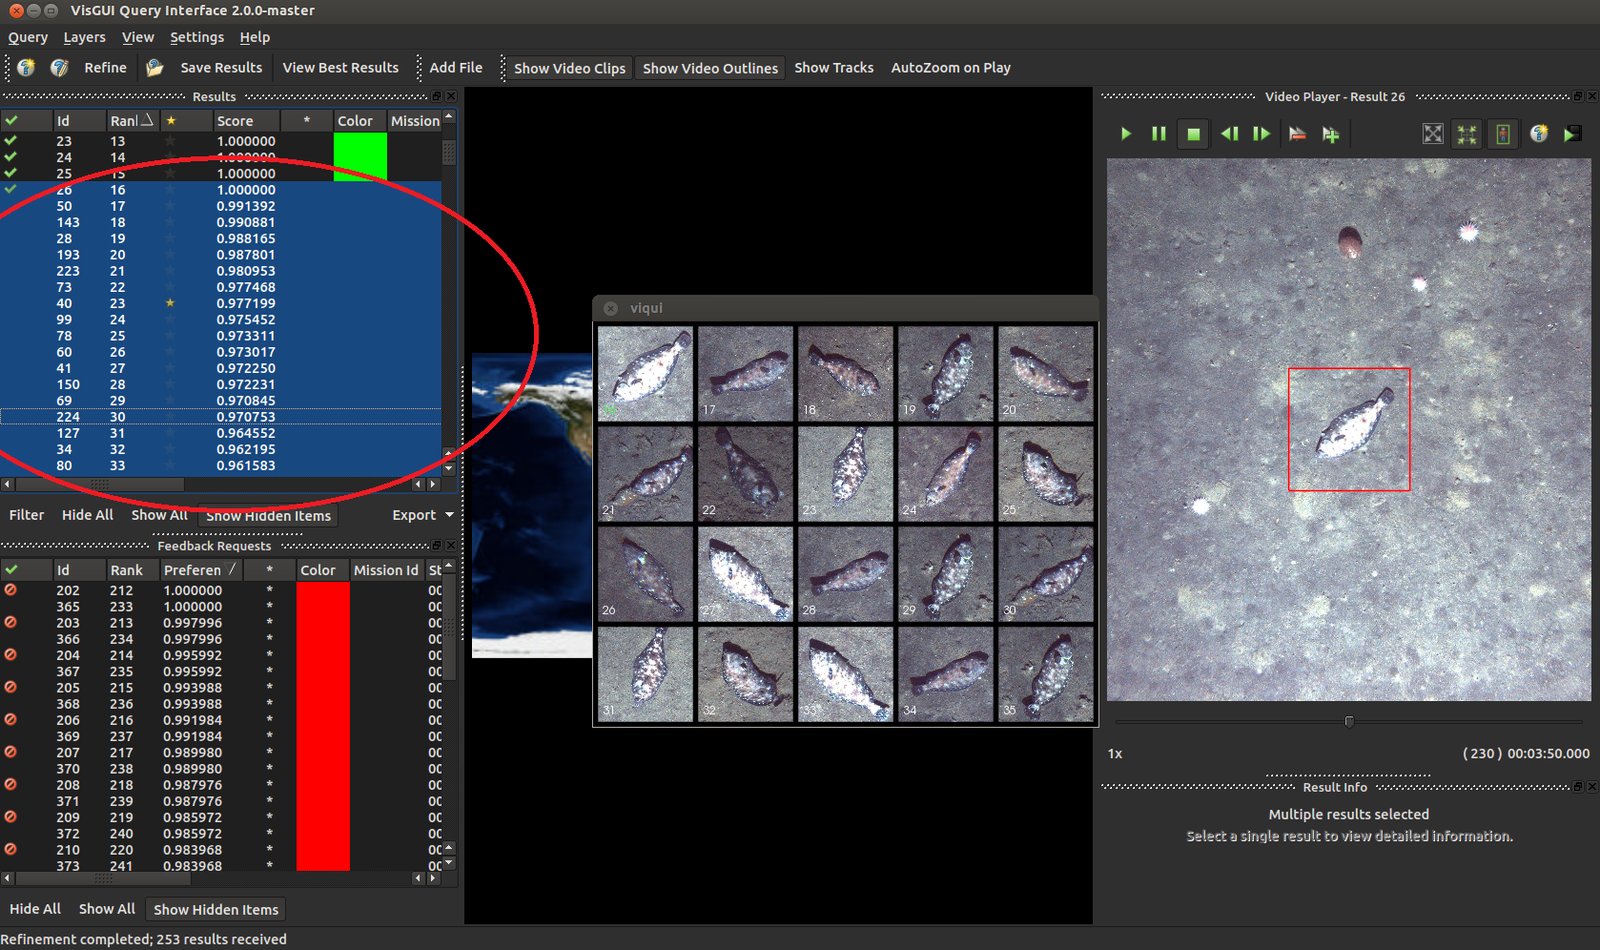
There we go, that’s a little better isn’t it.
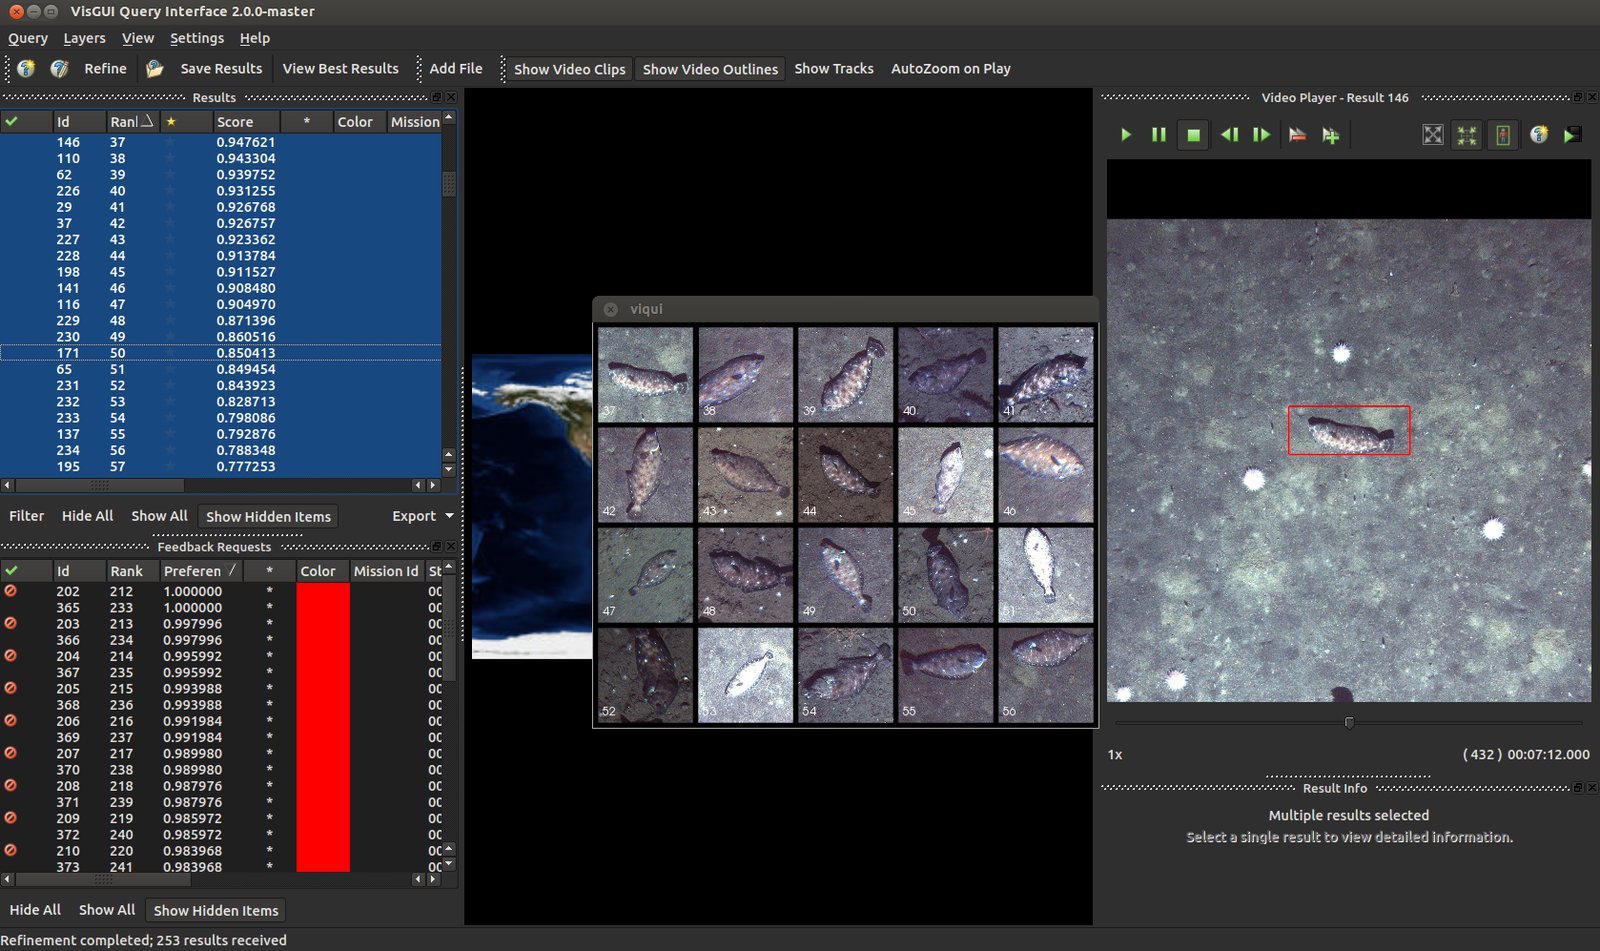
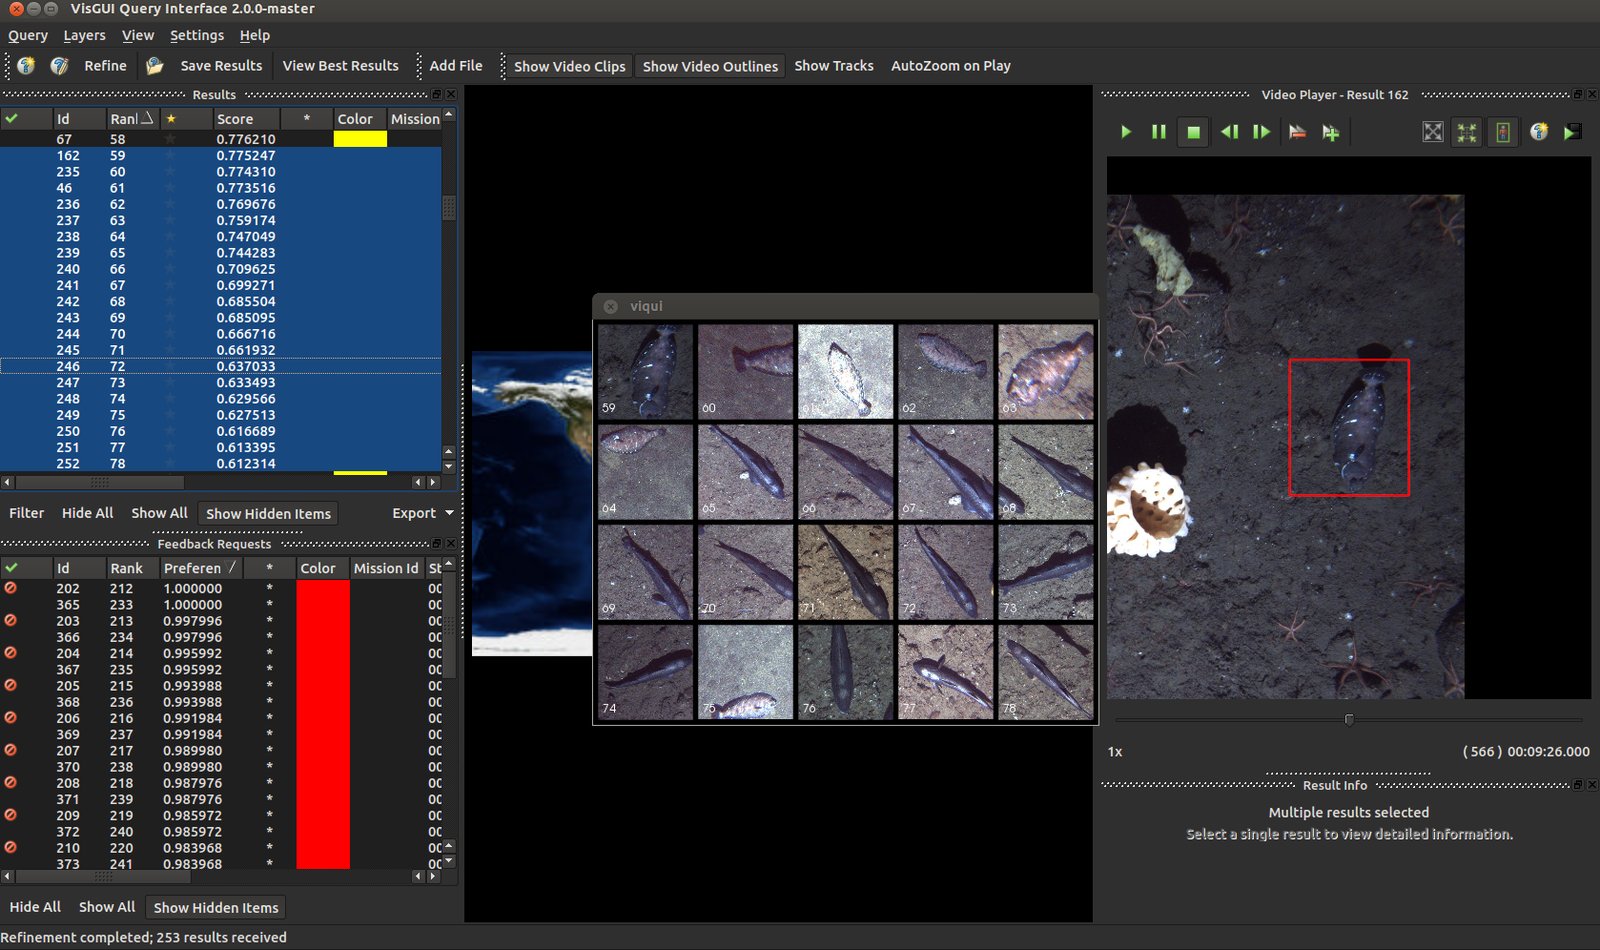
Okay these guys are a little weird, but nothing another round of annotations can’t fix.
After you’re happy with your models, you should export them (Query -> Export IQR Model) to a directory called ‘trained_model’ in your project folder for re-use on both new and larger datasets.
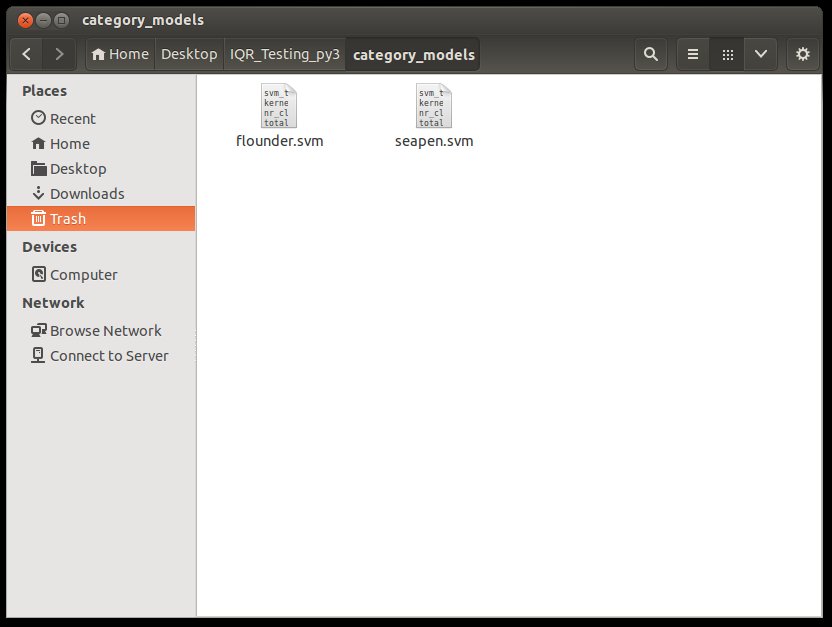
The category models directory should contain only .svm model files.
DIVE Documentation
DIVE query covers running video and image search from the interface, along with managing the search index for individual sequences.
Code and Build Flags
Flags to enable when building VIAME from source for this example:
VIAME_ENABLE_DARKNETVIAME_ENABLE_POSTGRESQLVIAME_ENABLE_PYTHONVIAME_ENABLE_PYTORCHVIAME_ENABLE_PYTORCH-RF-DETRVIAME_ENABLE_PYTORCH-VISIONVIAME_ENABLE_SVMVIAME_ENABLE_VIVIAVIAME_ENABLE_VXL
Add-ons providing the pipelines or models used: generic.
Command line tools:
- tools/database.py –
viame database - tools/index.py –
viame index - tools/search.py –
viame search - tools/view.py –
viame view
Pipeline and configuration files:
- configs/add-ons/generic/detector_svm_over_generic_proposals.pipe
- configs/pipelines/query_retrieval_and_iqr.pipe
- configs/pipelines/query_from_track.pipe
- configs/pipelines/database_apply_svm_models.pipe
- configs/pipelines/frame_classifier_svm.pipe
Source code:
- plugins/core/average_track_descriptors.cxx
- plugins/core/create_database_query_process.cxx
- plugins/core/filter_frame_process.cxx
- plugins/core/full_frame_detector.cxx
- plugins/core/image_to_image_set_process.cxx
- plugins/core/query_track_descriptor_set_csv.cxx
- plugins/core/refine_detections_add_fixed.cxx
- plugins/core/refine_detections_nms.cxx
- plugins/core/select_database_query_process.cxx
- plugins/core/windowed_detector.cxx
- plugins/core/write_query_results_as_tracks_process.cxx
- plugins/cppdb/object_track_descriptors_db_process.cxx
- plugins/pytorch/rf_detr_detector.py
- plugins/pytorch/torchvision_descriptors.py
- plugins/svm/process_query_process.cxx